Tuesday, November 30, 2010

Second Semester Metals Part 2- Everything Else

So after those 5 weeks of making earrings AND working on the first project, I was delighted to be able to just focus on doing the project. It's good to know that I can work at that pace, but even better to know I don't have to anymore.

The rest of this semester was spent learning to cast, which is how most jewelery sold in stores is made. Casting is fun, hard, time-consuming, and somewhat dangerous. Most things we do have some elements of danger, but casting could cause some serious injury with just a minor mistake. Basically, here's how it goes down. We use various hardnesses of wax to carve, melt, whatever, in order to make our form. Then we use a mixture of plaster and silica to make a mold around our form. This is a tedious process. We have to wear respirators because the silica can cause serious lung injury, and the mixture cannot be too thin nor too thick. We only have about 5 minutes from mixing the powder with the water to get all the bubbles out before it starts to set up. It's a pain. But then the molds (with the forms still in them) then get put in the kiln where they get so hot that all the wax (or anything else that was used) gets burned out.

Then we begin the actual casting process. This must be done while the molds are still hot from burning out the wax, but they can't be TOO hot. The timing is very important. We have this centrifuge that holds the mold and holds the vessel that we use to hold the melted metal -the crucible. I like that name. So basically, metal chunks go in the crucible, then we use an oxygen/acetelyne torch to melt the metal until it's molten-aka completely liquid. Sometime during this melting, the mold is brought over and placed in the centrifuge. Then, while still heating the metal, you release the tiny pin (the only thing that keeps the centrifuge from flying while you're heating the metal) and the machine goes whizzing around in a circle, throwing the molten metal into the mold. At this point, if there were any cracks in the mold AT ALL, molten metal goes flying, which is obviously super dangerous. It happened a few times, either because people didn't make the molds right, they got the form too close to the bottom of the mold, or they did not properly gauge the amount of metal and put too much in.

After this, we let the mold cool just a little, then we plunge it into a bucket of water and let all the investment bubble out. The mold is still REALLY hot, so the water gets hot fast. It's fun though, I like this part. Sooooo here's what i made with this whole process.


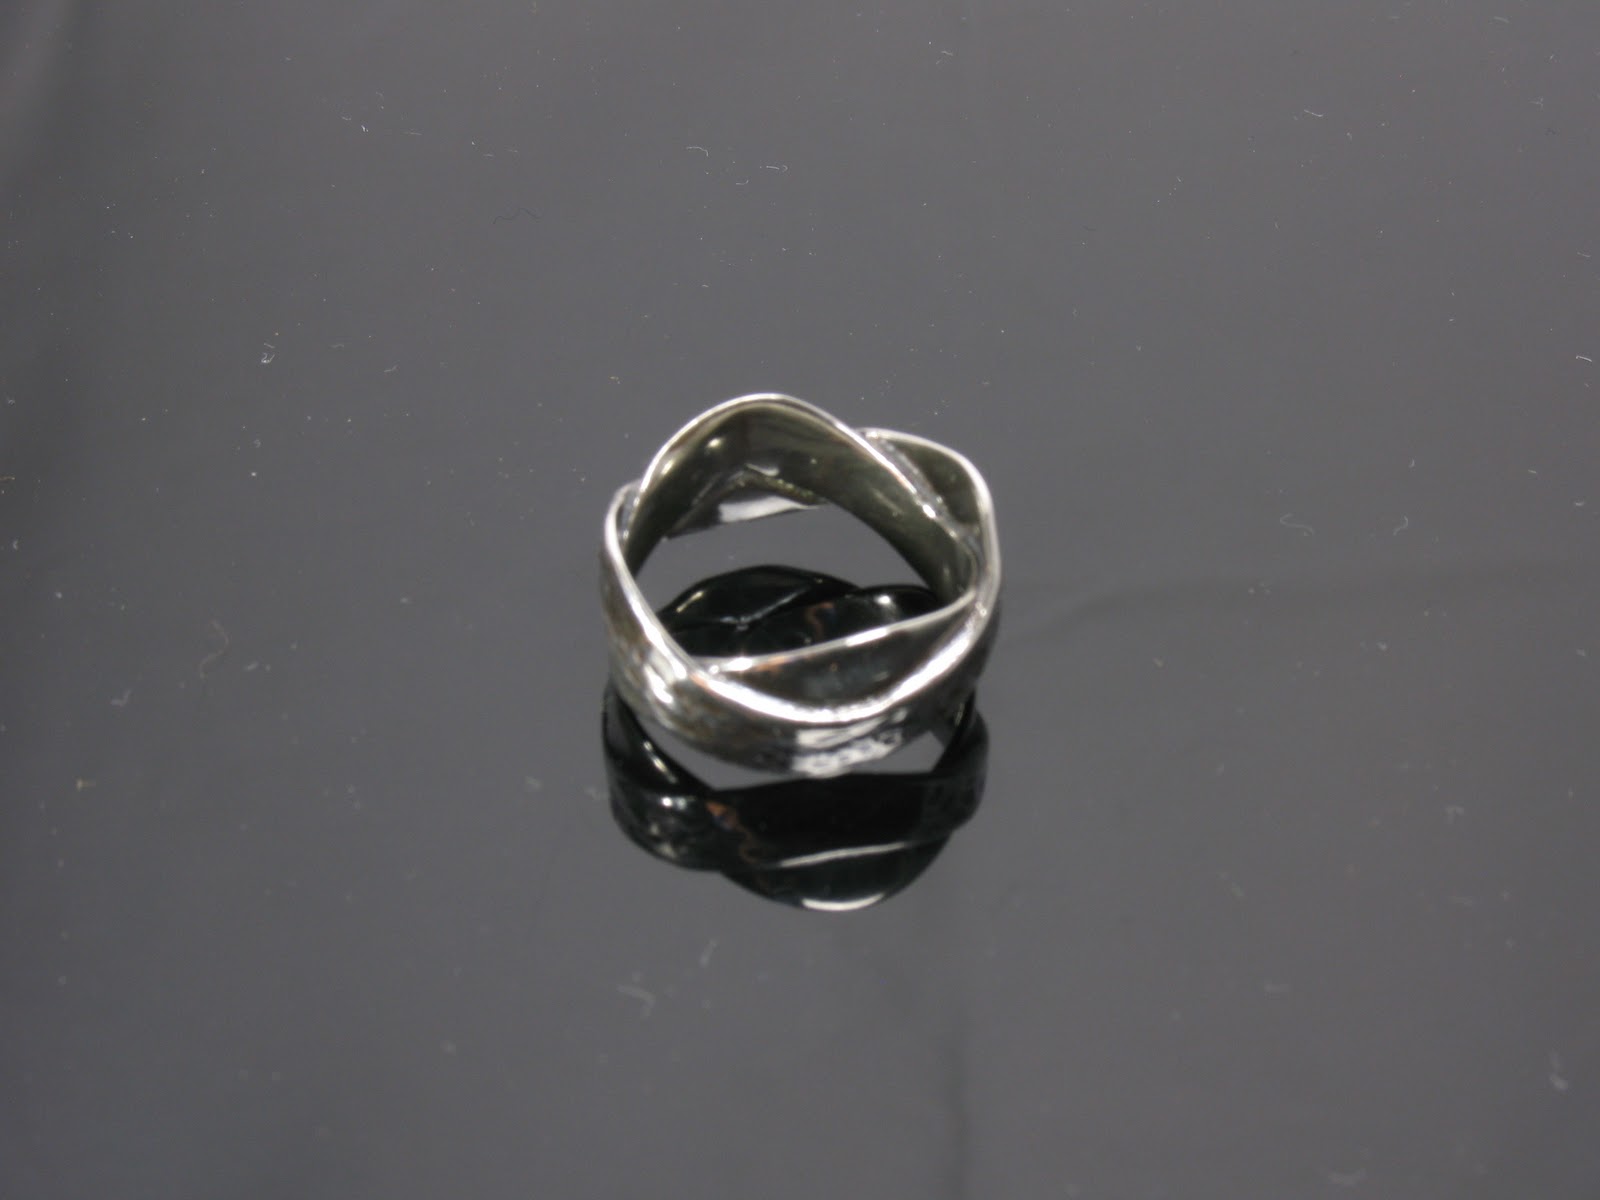
Set of 3 rings that associate in some way. Carved totally out of wax, cast in sterling silver. I love them, but my fingers have gotten fatter since then...


My next forms were made experimenting with barbie parts. The blue wax is the carving wax we use, and the red is for making the sprues. The sprue system is like a tunnel system to allow the metal to get into every part of the form. Based on the physics, there are just some places in certain forms that the metal cannot reach thru centrifugal force, so making sprues allows the metal to get in there. The sprue wax is super soft so I used it to help blend the barbie parts with the blue wax. It looks creepy like this though. Ps- the texture in the blue wax is just what happens when you pour melted wax into ice water. I saw them do it on the food network with melted sugar, so I thought I would try it. Cool, huh?


 I didn't set out for them to be anything specific, they were just the result of me playing around. I think they look like some sort of mutant coral or something, and my teacher thinks they look like barnacles.


I really wanted to cast orchids because I think they're just beautiful. I coated the first one in wax because I wasn't sure if it would be thick enough to stand up to the mold. You can see the sprue system in this picture, to give you an idea of what I was talking about. All those red sticks fill with metal and we have to go in and cut them out. Seems like a waste, but that metal just gets melted back down in the next casting. 


I wanted to keep playing with the barbies, so I added their faces, hands, and feet to some orchids. I love the result, and though I have been told it's confusing or too blatant with the imagery, I have a whole series of these in my head. 


I used a patina to make what was the red sprue wax into what looks like a mold/moss like growth.


The male mutant flower


 Aaaand at this point, we all realized how much Ken looks like JFK. Crazy.

Wednesday, November 17, 2010

Second Semester Metals Part 1 - Earrings

This semester went a little differently than last semester. We were tasked with the job of creating a pair of earrings every week for 5 weeks while STILL working on our first project. It was crazy but I loved working with smaller forms. The earrings were meant to be a way for us to experiment with new techniques without having to commit time and money to a large form. I decided to experiment with fold forming, and I fell in love with it. It is so easy, from a technical standpoint. You fold the metal like paper. No soldering or fancy tools needed, just a hammer and an anvil (and a way to anneal the metal). Here are three of the earrings I made. As it got closer to that first project being due, I slacked a bit on my earrings, so the last two pair are not something I'm proud of. But these are!


Copper fold-formed ruffles soldered onto brass backing (just plain brass, no designs) to give them weight. 


Copper sheet fold-formed into leaf shapes and patinated using heat to turn the copper a brownish color.


Brass sheet fold-formed into callalillies. My whole class says they look like female reproductive parts. I see this, but at the same time that is the purpose of a flower so it only makes sense. The brass is much harder to fold-form than the copper because brass is inherently a harder material than copper. As you work with it, it gets harder faster and therefore needs to be annealed much more often. 

Annealing is the process of heating the metal up to a certain temperature in order to loosen the mollecular structure. In blacksmithing, which most of us have seen on TV, they heat the metal to red-hot and hammer it on the anvil while it is still glowing bright orange. This is NOT annealing. We heat the metal up to a point somewhere around 1300 degrees (I have the exact temperature on a sheet somewhere, I just can't find it right now). If done properly, annealing does NOT make the metal red hot. The metal takes on a slight pinkish glow and the tip of the torch flame turns from blue to orange/yellow. At that point, the molecules are loosened as much as they're going to be before they begin to break down and start melting. We then quench the metal in some water (just put the hot metal in a bowl of cold water) so that it cools rapidly, we take it out and go on our merry way.

First Semester Metals

Ok, I'm going to cram a whole semester of metalwork in this post. Since I didn't document the process like I did in the last one, it shouldn't be too bad.

Our first project was a study in riveting. I made this:

It's me....though very abstracted. I learned about hidden rivets and regular rivets doing this piece. I could definitely afford to do it again now that I have better control with a hammer and more knowledge of the techniques.


Detail.


This is the original picture that I based the piece off of, just so you can get an idea.

For our second project, we did band-on-band rings. This was my first time working with silver, and this is the point where we learned to solder. We use solder that melts around temperatures between 1300 and 1440 degrees, depending on which type you use. We do not use the type of solder that you use a little soldering iron for. That's called plumbing (or soft) solder and it isn't really strong enough to stand up to what we put our jewelery through. We use torches, and it's fun.

It is important to note that this ring was made by taking two pieces of silver, forming them into rings, and then soldering them together. It is not cast like most of the rings sold in stores.

For the third project we were tasked with making a toy that is also a ring. The perameters were pretty open for this one. The concept of what is a toy was left compeltely up to us, and as long as a finger could go through the piece somehow, it was considered a ring. I decided it would be funny to make an electrical outlet ring, since some kids apparently think those are toys.

I roll-printed a canvas texture on it to make it look like wallpaper. The bottom and top look slightly different because they are made in two different ways. The bottom is a hollow construction. The holes go all the way through and the form is completely closed up. The top one is not made like that. The face of the top one comes off so it can hold things. Originally it was supposed to hold an LED light, so that if you stuck something in the socket, it would light up. Unfortunately, I could never get that to work for more than about 10 minutes, so I just left it empty and open to possibilities.


That's Lauren's hand. This piece is actually in Houston RIGHT NOW, at the Houston Center for Contemporary Craft, in their CRAFT TEXAS juried exibition! It's my first show!

Our final project was to create a reliquary with a found object. Last Christmas, as a gag gift, I got a little resin Elvis bust (because I like Elvis), so I decided to make him a stage. Check it out:


He comes complete with a functioning curtain and a rotating platform so you can make him dance!

 From the back, with his jailhouse-esque bars
I had an old snowglobe music box that plays "Blue Sued Shoes", so I took it out and installed it in the bottom platform, so he has music to dance to.

Here's Lauren making him dance!


And there you have it! My first semester doing metals. I spent the first two projects thinking I sucked at it, and then by the third project I had gained a little more confidence, which I think is evident in the work.


Monday, November 8, 2010

First Metal Experience Ever

During the summer of 2009, I took part in the Art Educators Retreat at SFA. I learned some things about teaching, because our guest speaker was a teacher, but mostly it was just a place for art teachers to make art. I felt pretty out of place because I was the only person in the whole retreat who wasn't a teacher. I needed the retreat for a class credit. One of the sessions was a metalworking class. Overall I think we were supposed to spend about 5 hours working in the metal shop over the course of the week. Several of us decided to ditch the other projects and only work on metals. I think by the end of it, I calculated that I spent about 15 hours working in the metal shop that week. Since part of the assignment for credit was to document the retreat with pictures (for an end presentation), I have step-by-step pictures of what I made. This is the only instance for which anything but the end result is documented.


Here you see my two sheets of metal-one brass, one copper (both about 2x3 inches), along with my sketch and a material (I think it's actually some sort of Christmas garland) that I planned to use for texture.


 Ahhhhh, my first experience with the rolling mill. So wonderful and exciting to see plain sheet metal go in, and textured sheet metal come out!!! Basically, you make a metal "sandwich" with your texturing material in between both sheets, and you run it through the rolling mill. The mill presses the sheets together, and stretches them just a bit. The end result is two sheets of textured metal, and one really messed up texturing material. Any material used for texturing will get very messed up, so it's not a good idea to use something that you want to reuse or that is hard and brittle. Fabrics work really well, along with screen, wire, ribbon, file-folder paper, and sand paper. 


 My next step was to cut circles out of my metal. I was going to have to saw each little circle out, but then Lauren showed me the wonderful Pepe Disc Cutters. I love the disk cutters because they are so fast, easy, and they make perfect circles. A quick file on the under side of the metal and you're done! I ended up making matching earrings out of the left over circles that I cut out.


Since I was doing a two-layered pendant, I wanted the top layer to have some dimension to it, so I used the hydraulic press. The press is really cool, though anyone who works on cars probably thinks it's the most mundane, everyday thing. We have several pre-cut dyes in our studio, along with some materials to make our own shape if we desire. You take a dye, which is made from thick plexiglass (about 1/2 inch or 3/4 inch), and place it over your metal. Then we have some urethane pads of varying hardness (we use the yellow one the most, it's the most squishy) and a nice spacer. You put all that in the press and start pumping. To get a good, dimensional form, we pump to about 3500. Then voilĂ , formed metal. 


Uumm so at this point, my picture taking went down the drain apparently. After forming the top dome, I cut both pieces into circles. I then drilled holes in each and riveted them together. Riveting was very difficult for me, but again I only had a quick explanation in a room full of people. I understand it a lot better now, and consequently I am a better riveter now. Anyway after the riveting (and somewhere along the way I bent some scrap into a quick bale for my pendant to hang from), Lauren helped me change the color with some liver of sulfur. This is a stinky, yellowish chemical that turns copper and silver varying shades of brown/black, depending on how long it's in there. Since the bottom was brass, it didn't turn any color.


Then I waxed it with paste wax to keep it from fingerprinting and this is how it looked at our final show at the end of the retreat! As you will see, I became a metals addict, and I have no desire to recover.

Sunday, November 7, 2010

First Things First

I guess the logical place to start is to give some background info on myself and what things I have made already. I will share photos, inspiration, and my personal thoughts on improvement.

While I am currently a graduate student in the art education field, I have not been studying art for very long. I took my first art class my junior year of college, when I took drawing. I've always been creative, making all sorts of things, but I didn't start focusing that energy on art until I was about 20. Until then I used my creative impulses for singing, playing the piano, and arranging music. Now, I'm 25 and I've basically decided that art is the thing for me. I graduated with a Bachelors of Arts in Psychology and Spanish in 2008 from SFA, and I started graduate work in spring of 2009 with my printmaking class. I will graduate with my masters in May of this year, and I am beginning to work on applying for an MFA program in metals.

I had my first metals experience in summer 2009 during the Art Educators Retreat. I then took the intro metals class in Fall 2009, advanced metals in Spring 2010, and I am currently in advanced metals again right now. I'll start posting pics and things tomorrow.

So.....I made a blog...

Alright. I have given in and made a blog. Mostly I decided to start blogging so I would have an avenue for thoughts, ideas, and opinions. I enjoy the idea of having somewhere to show my art, but I'm also excited about having a place to talk through my ideas and not have to worry about losing my sketchbook. I'm hoping that having this blog makes me become more meticulous about documenting my life. Do you know I barely take any pictures of anything? Mostly because I'm awful at taking pictures, but I need to at least try.The only reason I have pictures of my artwork is through my wonderful professor, Lauren McAdams. If it wasn't for her....well...I'd have crappy images of everything. Don't get me wrong, I do the best I can with what skills and equipment I have, its just I'm severely lacking in the "skills" department. So if you see a great, high-quality picture on my blog that looks like it was taken by someone who cares, chances are it's a McAdams picture.

So....what do I write about?